IRIS TUTORIAL
Make B&W master frames
Introduction
Prelaminary note: For compute RAW calibration images for DSLR camera (CFA pixem structure) use the equivalent commands of the Digital photo menu - see the tutorial here.
Long exposure CCD / DSLR deep sky images are always distorted by three types of defects:
(1) During the exposure, a thermal interference signal builds up in each pixel while collecting the signal from the observed object. The CCD needs to be cooled to a cryogenic temperature (100K, or -173°C) to reduce this signal to a negligible level. Unfortunately, most CCD or CMOS cameras suffer from the effects of this signal when they are only slightly cooled (temperature over -50°C) or not cooled (DSLR camera). The principal consequence of the dark current (whose name comes from the fact that is it present even when the detector is in total darkness) is noise on the image. This noise has two origins:
- a shot noise (or signal noise) proportional to the square root of the accumulated parasitic signal.
- a spatial noise due to the fact that each pixel in the image reacts differently to the dark current, which gives a grainy aspect to the raw image. This sensitivity difference to the dark current is strongly correlated from one image to another, so it is possible to produce a reference map of the interference signal to correct the images. The dark current map is obtained by the accumulation of many (typically 7 to 15) long exposure images taken in complete darkness. The CCD should be cooled as usual to reduce the reading noise.
(2) In addition to the useful signal, there is a DC offset that has a value that is independent of the integration time and somewhat independent of detector temperature. This offset is induced by the characteristics of the detector output amplifier and of the video electronics. This signal can easily be eliminated by subtracting an offset map from the images to be processed. This map is obtained by averaging several images acquired with a minimum integration time in total darkness.
(3) The detector pixels do not all have the same sensitivity to light. As a consequence, if the detector is illuminated with a uniform source, the resulting image will not necessarily be uniform. Just as for the dark current, a spatial noise that degrades the detectability and the photometric quality will be recorded. In addition, the telescope focal plane is never perfectly flat illuminated because the existence of optical vignetting, the presence of dust in the optical path, ... These effects are like a local fluctuation in the gain of the CCD. This gain can be corrected for by dividing the images to be treated by the image of an uniform field. This image, called the flat-field image, is obtained typicaly at twilight, when the sky is still bright enough to get a relatively strong signal with a short integration time. An alternative solution is to observe a white screen near the entrance aperture of the telescope.
For more informations about preprocessing, click here.
Compute the master offset frame
Take the median sum of many individual offset image for produce a high signal to noise master. The resulting image is also know as a superoffset (or superbias).
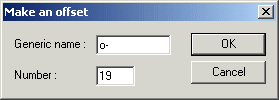
If the sequence of individual offset frames is o-1, o-2, ... o-19, open the Make an offset dialog of Preprocessing menu and enter the parameters

Click OK and save the result:
>SAVE OFFSET
The equivalent console commands are:
>SMEDIAN O- 19
>SAVE
OFFSET
Compute the master dark frame
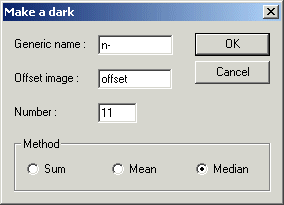
Suppose the set of dark frame (taken with the same integration time and same temperature) n-1, n-2, ..., n-11.
Open the dialog box Make a dark of Preprocessing menu, and
then
>SAVE DARK
The software take the median sum of the images (n-1 - offset), (n-2 - offset), ... (n-11 - offset).
The equivalent console commands are:
>SUB2 N- OFFSET I 0 11
>SMEDIAN
I 11
>SAVE DARK
Compute the flat-field master frame
Suppose the f-1, f-2, ..., f-13 individual frame image (taken on an uniform field).
Open the dialog box Make a flat-field of Preprocessing menu, then
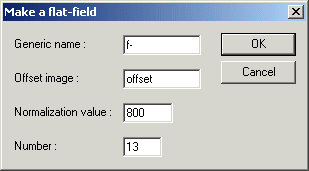
(1) Iris compute the difference (f-1 - offset), (f-2 - offset), ..., (f-13 - offset).
(2) Iris normalize the differences images to the given normaization given value (here 800, characteristic of the average count level in an individual flat-field frame).
(3) Iris evaluate the median sum of the normilized images
Save the result:
>SAVE FLAT
The equivalent consoles commands are:
>SUB2 F- OFFSET I 0 13
>NGAIN2
I I 800 13
>SMEDIAN I 13
>SAVE FLAT
Important note: the exposure time of the individual flat-field images is here considered sufficiently short so that the darkk current is regarded as negligible. If DARK2 is a dark master for the same integration time used for take flat-field:
>LOAD OFFSET
>ADD
DARK2
>SAVE N
then
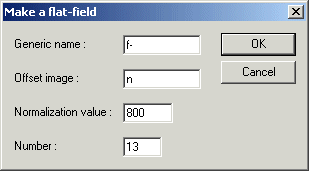
or
>SUB2 F- N I 0 13
>NGAIN2
I I 800 13
>SMEDIAN I 13
>SAVE FLAT
If the exposure time is not identical for the flat-field and for dark frames, excecute the following commands:
>OPT2 F- DARK I 13
>SUB2
I OFFSET I 0 13
>SMEDIAN
I 13
>SAVE FLAT
The result is a master flat-field or a superflat.
Extract the flat-field from image science
A moderately dense star field was observed at typical 11 offset position (for example) separed by about 10 to 20 pixels. The images are named f-1, f-2, ... f-11. Here the first three randomely diphrered images:
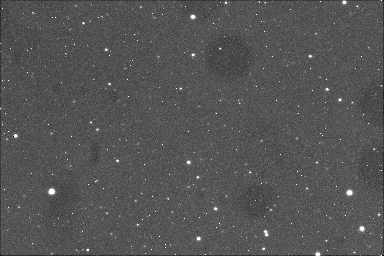
Image
F-1
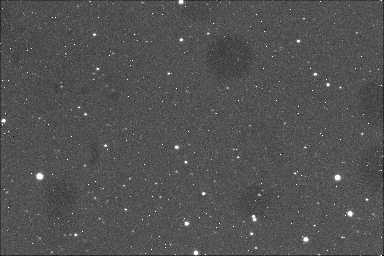
Image
F-2
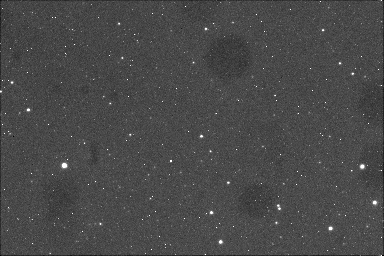
Image
F-3
The offset and dark master frame are supposed available:
Step 1: Remove the offset signal
>SUB2 F- OFFSET I 0 11
Step 2: Remove the dark signal (by optimization of the multiplicative coefficient here):
>OP2 I DARK I 11
Step 3: Normalize at a given value (here 900), the median sum of pixel intensity for each image:
>NGAIN2 I 900 I 11
Step 4: The superflat is computed by the median sum method for a maximal rejection of accidental artifact (cosmic rays, ...):
>SMEDIAN I 11
Step 5: Save the result
>SAVE FLAT
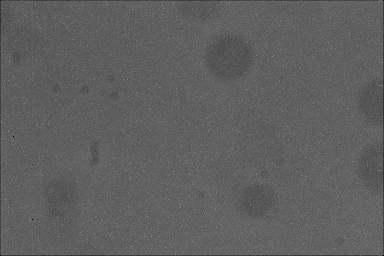
The
computer superflat.
Now, it is easy to preprocess an image. For example:
>LOAD F1
>SUB OFFSET 0
>SUB
DARK 0
>DIV FLAT 900
The latest operation is (in-memory image / flat) x 900.
|
|
|
Remenber, for compute master frames for 48-bits documents, use the equivalent
commands of Digital photo menu